Halloween 2010 - Homemade Thomas The Tank Engine Costume
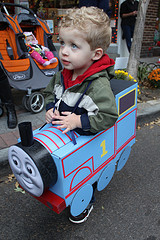
 Darren's been pretty heavy into Thomas the Tank Engine lately, so we thought it would be a good costume for Halloween this year. I'm not a huge fan of the pre-made Thomas costumes, and I thought I'd have a good time making one, so what's what I decided to do.
Boo.
Update: Be sure to also check out the second train costume I made, as there are some improvements.
I liked the idea of using cardboard boxes and suspenders to basically hang Thomas around him. So I found some boxes that were just about the right dimensions -- 9in wide x 8.5in tall x 13in long each. (Keurig K-Cup boxes, for the record. I had to drink a lot of coffee).
Just laying out the boxes, I could already see a basic train form. I was optimistic.

My apologies for the terrible photo quality. Using my phone is so much easier then breaking out the camera
I taped the boxes together and cut a hole for Darren to stand in. I had him try it on, and he seemed to be into it, both literally and figuratively. That was a good sign, because I'd like to avoid having to carry it around the neighborhood after he refuses to wear it. Let's hope for a warm Halloween, though, as there isn't much room in there for a jacket.

I needed a tube to create a nice curve along the top and circle at front. It took a while, but eventually I found an 8" cardboard tube intended to be a form for concrete columns. It was just about right. I got mine at Home Depot, but Amazon sells them as well.

I cut a 2¼-inch slice off the tube, leaving a "tab" that will extend back along the top, giving the impression that the whole tube extends back. In train lingo, this is known as the "caboose."

Next I cut a circle in the top of the tube for the smoke stack. This proved to be strangely time-consuming, since this was tough cardboard. I went slow, since I wanted to have a tight friction fit, so I wouldn't need tape on the outside.
The smoke stack itself is just a paper towel tube. Amy wanted to have cotton "steam" coming out, but I had other plans. More on that later.

This would make a good tank costume, too.
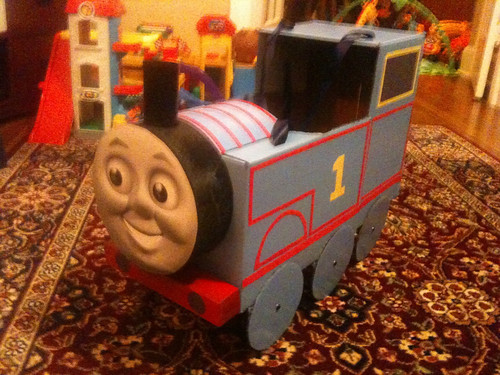
For the face, I traced the big tube onto spare cardboard, and cut a circle. A Google search for Thomas, a bit of Photoshop magic, and the "Print" button gave me the face. Here's the high-res Thomas face, for anyone trying to make this costume. It's not as sharp as I had hoped, but it still looks good.
I made circles for wheels. Squares wouldn't have worked as well. Amy wanted them to be spinnable, so I attached them with nuts and bolts instead of tape, my original plan.

I made a small slender box out of a manila folder to serve as the red part on the front (not pictured). On a train, this piece is called the "conductor".
I applied a spray paint primer to everything, which was probably overkill, but I didn't want the printing on the boxes to show through the final product. I got one of these spray paint trigger thingies, having learned my lesson on last year's Back to the Future costume. If you're going to be spray-painting for more than 30 seconds, I recommend one of these.
The blue paint I found was good, but lighter than what I wanted, but I suppose Thomas the Tank engine graffiti isn't too common, so the paint manufacturers aren't making any yet. The Red was a better match. (The Amazon links to the left are the exact colors I used)
After the paint dried, I cut slits for the shoulder straps. Amy found a nice ribbon in her sewing supplies, and I threaded it through the slits.

The last step was to apply the detailing. For this we just used construction paper and spray adhesive.
This spray stuff is great. I've used it on a few projects now. Everything sticks well, yet you have several minutes to reposition things if needed. Just make sure to do the spraying on a tarp or something, since the surrounding area may get sticky.
Amy did pretty much all the detail work, and it came out great.


 [/url]
 [/url]
.jpg)